• Login
Saturday, March 7, 2026
The Cloud Guru
  • Home
  • AWS
  • Data Center
  • GCP
  • Technology
  • Tutorials
  • Blog
    • Blog
    • Reviews
No Result
View All Result
Saturday, March 7, 2026
  • Home
  • AWS
  • Data Center
  • GCP
  • Technology
  • Tutorials
  • Blog
    • Blog
    • Reviews
No Result
View All Result
The Cloud Guru
No Result
View All Result

Setting up Jenkins on Kubernetes Engine on GCP

Team TCG by Team TCG
October 1, 2023
in 2 Minute Tutorials, GCP, Kubernetes
0 0
0
Home 2 Minute Tutorials
0
SHARES
21
VIEWS
Share on FacebookShare on Twitter

Activate Cloud Shell

Cloud Shell is a virtual machine that is loaded with development tools. It offers a persistent 5GB home directory and runs on the Google Cloud. Cloud Shell provides command-line access to your Google Cloud resources.

  1. Click Activate Cloud Shell Activate Cloud Shell icon at the top of the Google Cloud console.

When connected, you are already authenticated, and the project is set to your PROJECT_ID. The output contains a line that declares the PROJECT_ID for this session: Your Cloud Platform project in this session is set to YOUR_PROJECT_ID

gcloud is the command-line tool for Google Cloud. It comes pre-installed on Cloud Shell and supports tab completion.

  1. (Optional) You can list the active account name with this command:
gcloud auth list
  1. Click Authorize.
  2. (Optional) You can list the project ID with this command:
gcloud config list project
Output:[core] project = <project_ID>

Task 1. Prepare the environment

First, you’ll prepare your deployment environment and download a sample application.

  1. Set the default Compute Engine zone to <filled in at lab start>:
gcloud config set compute/zone
  1. Clone the sample code:
git clone https://github.com/GoogleCloudPlatform/continuous-deployment-on-kubernetes.git
  1. Navigate to the sample code directory:
cd continuous-deployment-on-kubernetes

Creating a Kubernetes cluster

Now you’ll use the Kubernetes Engine to create and manage your Kubernetes cluster.

  1. Next, provision a Kubernetes cluster using Kubernetes Engine. This step can take several minutes to complete:
gcloud container clusters create jenkins-cd \ --num-nodes 2 \ --scopes "https://www.googleapis.com/auth/projecthosting,cloud-platform"

The extra scopes enable Jenkins to access Cloud Source Repositories and Google Container Registry.

  1. Confirm that your cluster is running:
gcloud container clusters list

Example Output:

Look for RUNNING in the STATUS column:NAME LOCATION MASTER_VERSION MASTER_IP MACHINE_TYPE NODE_VERSION NUM_NODES STATUS jenkins-cd 1.9.7-gke.3 35.237.126.84 e2-medium 1.9.7-gke.3 2 RUNNING

  1. Get the credentials for your cluster. Kubernetes Engine uses these credentials to access your newly provisioned cluster.
gcloud container clusters get-credentials jenkins-cd
  1. Confirm that you can connect to your cluster:
kubectl cluster-info

Example output: If the cluster is running, the URLs of where your Kubernetes components are accessible display:

Kubernetes master is running at https://130.211.178.38 GLBCDefaultBackend is running at https://130.211.178.38/api/v1/proxy/namespaces/kube-system/services/default-http-backendHeapster is running at https://130.211.178.38/api/v1/proxy/namespaces/kube-system/services/heapster KubeDNS is running at https://130.211.178.38/api/v1/proxy/namespaces/kube-system/services/kube-dns kubernetes-dashboard is running at https://130.211.178.38/api/v1/proxy/namespaces/kube-system/services/kubernetes-dashboard

Task 2. Configure Helm

In this lab, you will use Helm to install Jenkins from the Charts repository. Helm is a package manager that makes it easy to configure and deploy Kubernetes applications. Your Cloud Shell will already have a recent, stable version of Helm pre-installed.

If curious, you can run helm version in Cloud Shell to check which version you are using and also ensure that Helm is installed.

  1. Add Helm’s jenkins chart repository:
helm repo add jenkins https://charts.jenkins.io
  1. Update the repo to ensure you get the latest list of charts:
helm repo update

Task 3. Configure and install Jenkins

You will use a custom values file to add the Google Cloud-specific plugin necessary to use service account credentials to reach your Cloud Source Repository.

  1. Use the Helm CLI to deploy the chart with your configuration set:
helm upgrade --install -f jenkins/values.yaml myjenkins jenkins/jenkins
  1. Once that command completes ensure the Jenkins pod goes to the Running state and the container is in the READY state. This may take about 2 minutes:
kubectl get pods

Example output: NAME READY STATUS RESTARTS AGE myjenkins-0 2/2 Running 0 1m

  1. Run the following command to setup port forwarding to the Jenkins UI from the Cloud Shell:
echo http://127.0.0.1:8080 kubectl --namespace default port-forward svc/myjenkins 8080:8080 >> /dev/null &
  1. Now, check that the Jenkins Service was created properly:
kubectl get svc

Example output: NAME CLUSTER-IP EXTERNAL-IP PORT(S) AGE myjenkins 10.35.249.67 8080/TCP 3h myjenkins-agent 10.35.248.1 50000/TCP 3h kubernetes 10.35.240.1 443/TCP 9h

We are using the Kubernetes Plugin so that our builder nodes will be automatically launched as necessary when the Jenkins master requests them. Upon completion of their work, they will automatically be turned down and their resources added back to the cluster’s resource pool.

Notice that this service exposes ports 8080 and 50000 for any pods that match the selector. This will expose the Jenkins web UI and builder/agent registration ports within the Kubernetes cluster.

Additionally, the jenkins-ui service is exposed using a ClusterIP so that it is not accessible from outside the cluster.

Task 4. Connect to Jenkins

  1. The Jenkins chart will automatically create an admin password for you. To retrieve it, run:
kubectl exec --namespace default -it svc/myjenkins -c jenkins -- /bin/cat /run/secrets/additional/chart-admin-password && echo
  1. To get to the Jenkins user interface, click on the Web Preview button in cloud shell, then click Preview on port 8080:
Expanded Web preview dropdown menu with Preview on port 8080 option highlighted
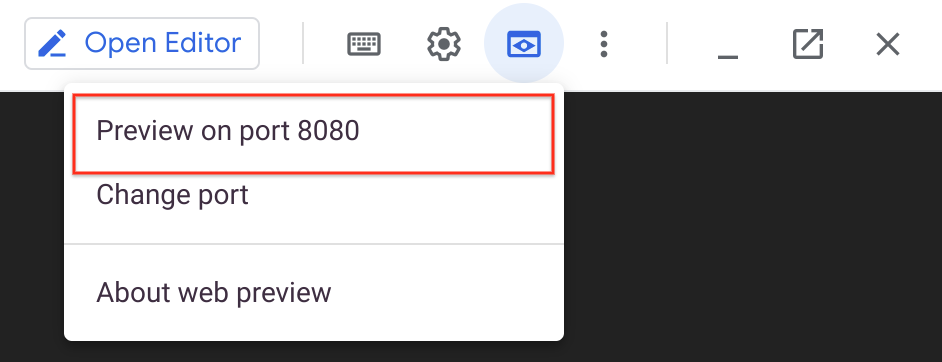
  1. You should now be able to log in with the username admin and your auto-generated password.

You may also be automatically logged in as well.

You now have Jenkins set up in your Kubernetes cluster!

Tags: Cloud ComputingHow toTutorials
Previous Post

How GE Harnesses AWS for Industrial Innovation and Predictive Maintenance?

Next Post

Continuous Delivery Pipelines with Spinnaker and Kubernetes Engine

Team TCG

Team TCG

Related Posts

Driving Success with Google Cloud: Real-World Hybrid and Multi-Cloud Case Studies

Hybrid and multi-cloud adoption has become the new norm for enterprises seeking to harness the power of cloud computing while...

by thecloudguru
November 28, 2023

Unleashing the Power of Google Cloud’s Hybrid and Multi-Cloud Solutions for Your Enterprise

In today's ever-evolving IT landscape, enterprises are seeking innovative solutions to harness the benefits of hybrid and multi-cloud environments. Google...

by thecloudguru
November 21, 2023

Mastering the Hybrid Cloud: Common Architecture Patterns and Implementation Strategies

The hybrid cloud has emerged as a dynamic solution for organizations seeking to balance flexibility, scalability, and control in their...

by thecloudguru
October 31, 2023
GCP

Setup Cloud Monitoring on GCP

Overview Cloud Monitoring provides visibility into the performance, uptime, and overall health of cloud-powered applications. Cloud Monitoring collects metrics, events,...

by Team TCG
October 1, 2023
GCP

Setting Up Cost Control with Quota

In this lab you will complete the following tasks: Queried a public dataset and explore associated costs. Modified BigQuery API...

by Team TCG
December 21, 2024
GCP

Distributed Load Testing Using Kubernetes

Activate Cloud Shell Cloud Shell is a virtual machine that is loaded with development tools. It offers a persistent 5GB...

by Team TCG
October 1, 2023
Next Post

Continuous Delivery Pipelines with Spinnaker and Kubernetes Engine

Leave a Reply Cancel reply

Your email address will not be published. Required fields are marked *

  • Trending
  • Comments
  • Latest

Azure Compliance: Policy, Blueprints, and Compliance Manager

September 21, 2025

Understanding Azure Subscriptions and Resource Groups

December 23, 2024

Azure Sphere: Securing IoT Devices

October 21, 2025

Azure Case Study: How Spotify Uses Azure

January 15, 2025

AWS SnowMobile

0

Passwordless Login Using SSH Keygen in 5 Easy Steps

0

Create a new swap partition on RHEL system

0

Configuring NTP using chrony

0

Cloud Monitoring: CloudWatch vs Azure Monitor vs Operations Suite

December 31, 2025

Infrastructure as Code: CloudFormation vs ARM Templates vs Deployment Manager

December 31, 2025

Cloud CLI Tools: AWS CLI vs Azure CLI vs gcloud

December 30, 2025

Hybrid Cloud Solutions: AWS Outposts, Azure Stack, and GCP Anthos

December 30, 2025

Recommended

Cloud Monitoring: CloudWatch vs Azure Monitor vs Operations Suite

December 31, 2025

Infrastructure as Code: CloudFormation vs ARM Templates vs Deployment Manager

December 31, 2025

Cloud CLI Tools: AWS CLI vs Azure CLI vs gcloud

December 30, 2025

Hybrid Cloud Solutions: AWS Outposts, Azure Stack, and GCP Anthos

December 30, 2025

About Us

Let's Simplify the cloud for everyone. Whether you are a technologist or a management guru, you will find something very interesting. We promise.

Categories

  • 2 Minute Tutorials (7)
  • AI (3)
  • Ansible (1)
  • Architecture (3)
  • Artificial Intelligence (3)
  • AWS (508)
  • Azure (3)
  • books (2)
  • Consolidation (4)
  • Containers (1)
  • Data Analytics (1)
  • Data Center (11)
  • Design (1)
  • GCP (13)
  • HOW To's (17)
  • Innovation (1)
  • Kubernetes (8)
  • LifeStyle (2)
  • LINUX (6)
  • Microsoft (2)
  • news (3)
  • People (4)
  • Reviews (1)
  • RHEL (2)
  • Security (2)
  • Self-Improvement and Professional Development (1)
  • Serverless (2)
  • Social (2)
  • Switch (1)
  • Technology (473)
  • Terraform (3)
  • Tools (1)
  • Tutorials (13)
  • Uncategorized (9)
  • Video (1)
  • Videos (1)

Tags

2Min's (7) Agile (1) AI (5) Appication Modernization (1) Application modernization (1) Architecture (1) AWS (43) AZURE (4) BigQuery (1) books (2) Case Studies (17) CI/CD (1) Cloud Computing (525) Cloud Optimization (1) Comparo (17) Consolidation (1) Courses (1) Data Analytics (1) Data Center (8) Emerging (1) GCP (11) Generative AI (1) How to (14) Hybrid Cloud (5) Innovation (2) Kubernetes (4) LINUX (5) lunch&learn (473) memcache (1) Microsoft (1) monitoring (1) NEWS (2) NSX (1) Opinion (3) SDDC (2) security (1) Self help (2) Shorties (1) Stories (1) Team Building (1) Technology (3) Tutorials (20) vmware (3) vSAN (1) Weekend Long Read (1)
  • About
  • Advertise
  • Privacy & Policy

© 2023 The Cloud Guru - Let's Simplify !!

No Result
View All Result
  • Home
  • AWS
  • HOW To’s
  • Tutorials
  • GCP
  • 2 Minute Tutorials
  • Data Center
  • Artificial Intelligence
  • Azure
  • Videos
  • Innovation

© 2023 The Cloud Guru - Let's Simplify !!

Welcome Back!

Sign In with Facebook
Sign In with Google
Sign In with Linked In
OR

Login to your account below

Forgotten Password?

Create New Account!

Sign Up with Facebook
Sign Up with Google
Sign Up with Linked In
OR

Fill the forms bellow to register

All fields are required. Log In

Retrieve your password

Please enter your username or email address to reset your password.

Log In